Polylang for Translations
This guide applies to:
- Basic
- Professional
In this guide
Introduction
Draw Attention works with Polylang, so you can offer your interactive images in every language your site supports. Each language gets its own version of the interactive image, with its own hotspot titles, descriptions, and links, and Draw Attention shows the right one based on the language of the page.
The steps are a little different depending on your edition, so we’ve split them into a section for the Basic (free) Edition and a section for the Pro Edition.
Setting up Polylang for Translations
Learn how to set up Polylang so it is ready for translation.
Step 1: Install and Activate
Before we can start translating, let’s install and activate Polylang. Head on over to your WordPress Admin Dashboard > Plugins > Add New and search for Polylang. Once you’ve located it, install and activate the plugin.
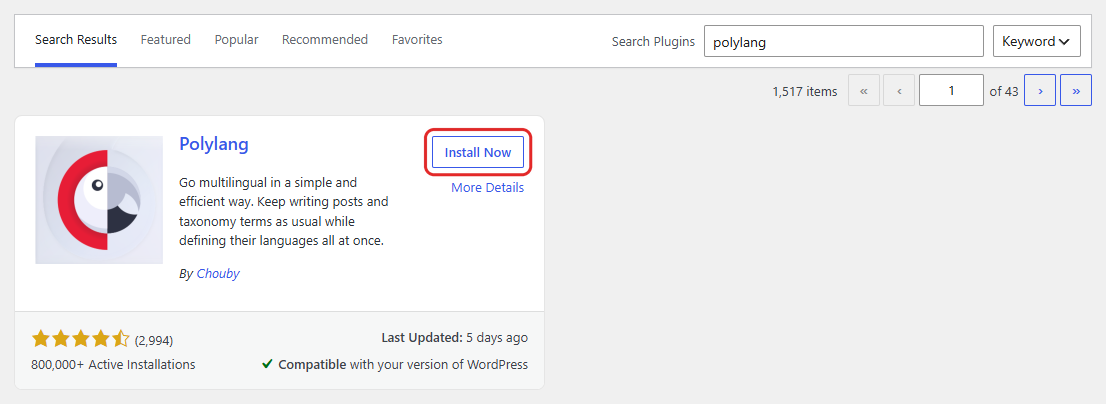
After activation, Polylang opens a setup wizard. You can use the wizard to add your languages, or head straight to Languages in your dashboard and follow the steps below.
Step 2: Select Languages
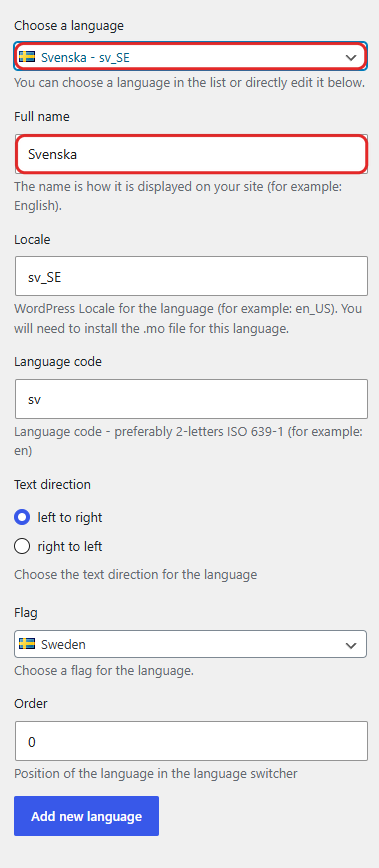
Go to Languages in your dashboard. Under Add new language, choose a language from the dropdown and click Add new language. Start with your site’s original language, then add each language you’d like to translate into.
Step 3: Check the Language Details
When you choose a language from the dropdown, Polylang fills in the full name, locale, language code, and flag for you. You can adjust any of these before clicking Add new language, but the defaults work for most sites.
Repeat Steps 2 and 3 for any other languages you decide to add.
Step 4: Select Default Language
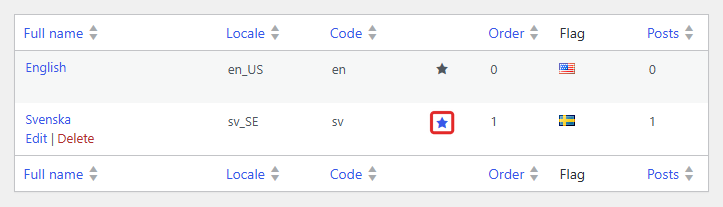
If you need to change your site’s default language, hover over your preferred language in the language list and click the star that appears.
Step 5: Include Draw Attention in the Custom Post Types
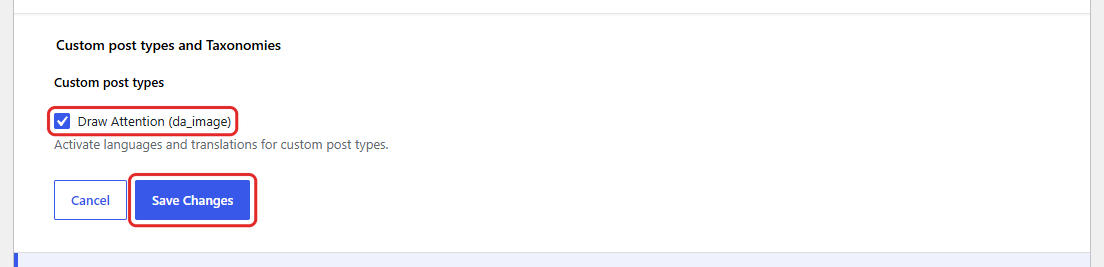
Navigate to Languages > Settings and open the settings for Custom post types and Taxonomies. Check Draw Attention (da_image) and click Save Changes.
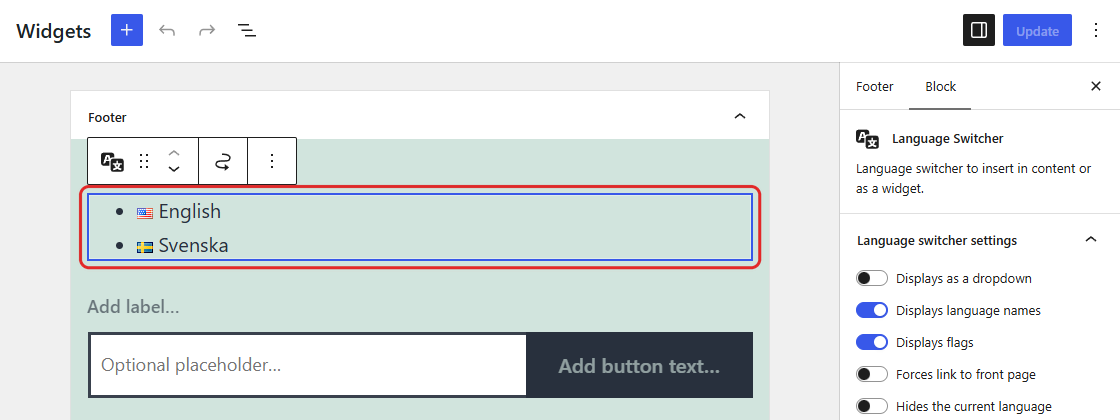
Step 6: Add a Language Switcher
A language switcher lets your visitors move between the different language versions of your pages. How you add it depends on your theme:
- Classic themes: Go to Appearance > Widgets (or Appearance > Customize > Widgets) and add the Language Switcher to a widget area.
- Block themes (like the default Twenty Twenty-Five theme): These themes don’t have a Widgets screen. Go to Appearance > Editor and add the Language Switcher block to your header, footer, or any template part.
The switcher only lists languages once you’ve published content in them, so don’t worry if it looks empty right after setup.
This helpful guide also goes over how to set up Polylang.
How to Translate Draw Attention
Now that Polylang is set up, it’s time to start translating! Follow the section for your edition of Draw Attention.
Draw Attention Basic Edition
In the Basic Edition, each language has its own separate interactive image. The images aren’t linked to each other as translations in the editor, but Draw Attention still shows the right image for each language on your site.
Step 1: Create Your Interactive Image and Hotspots
Make sure that you have created your interactive image and its hotspots in your original language first, and saved it.
If you haven’t yet, learn how to create your first interactive image here.
Step 2: Add a Translation from the Original Image
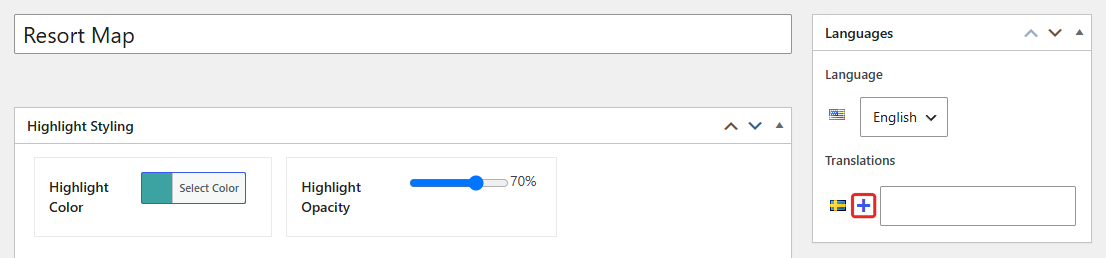
In your original interactive image, find the Languages box on the right-hand side. Under Translations, click the + icon next to the language you’d like to add.
This opens a brand-new, empty interactive image for that language. Your original image stays exactly as it is.
Step 3: Upload the Image and Recreate Your Hotspots
The new image starts empty, so you’ll need to:
- Add a title for this language’s image.
- Upload the same main image again, either from your computer or from your Media Library.
- Recreate your hotspots and translate the hotspot titles, descriptions, and links.
- Click Update to save.
Step 4: Add Your Next Language
To add another language, go back to your original image first:
- Click Draw Attention > Edit Image in your dashboard.
- If a different language’s image opens, use the language filter in the top admin bar to switch to your original language, then click Draw Attention > Edit Image again.
- In the Languages box, click the + icon next to the next language and repeat Step 3.
To edit a translation later, open your original image and click the + icon next to that language. It opens the existing image for that language instead of creating a new one.
In the Basic Edition, the + icons don’t change to edit (pencil) icons, even after you save a translation. That’s expected, and everything still works on your site.
Avoid the Language Dropdown on an Existing Image
The Language dropdown at the top of the Languages box doesn’t switch you to another translation. It changes the language of the image you’re editing. If you change it on your original image and click Update, your original image becomes the other language, and your original language no longer has an interactive image.
If this happens, change the dropdown back to your original language and click Update.
Draw Attention Pro Edition
In the Pro Edition, Polylang links each translation to your original interactive image, so you can switch between them right from the editor.
Step 1: Create Your Interactive Image and Hotspots
Make sure that you have created your interactive image and its hotspots in your original language first, and saved it.
If you haven’t yet, learn how to create your first interactive image here.
Step 2: Add a Translation
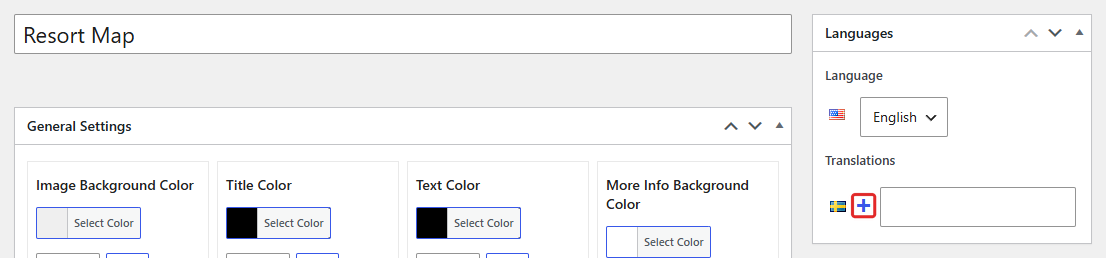
In your original interactive image, find the Languages box on the right-hand side. Under Translations, click the + icon next to the language you’d like to add.
This opens a new interactive image for that language, already linked to your original. Your main image carries over, so there’s no need to upload it again.
Step 3: Publish and Recreate Your Hotspots
Add a title for this language and click Publish. Once the translation is published, the hotspot settings appear.
Hotspots aren’t copied over, so recreate your hotspots and translate their titles, descriptions, and links. Then click Update.
Step 4: Switch Between Translations
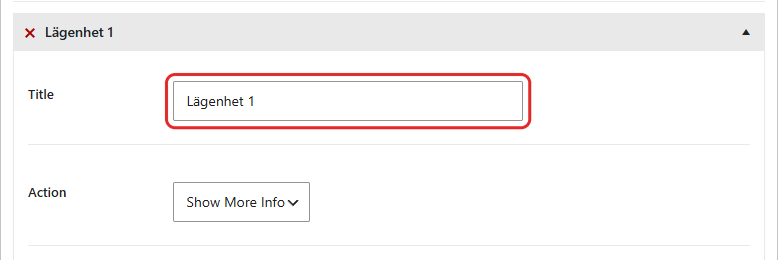
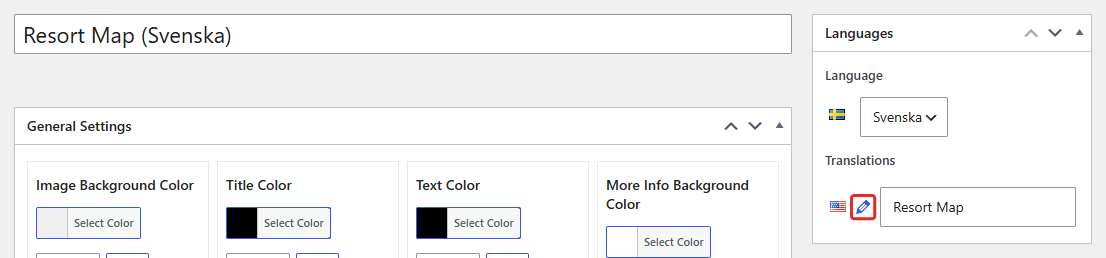
Once a translation is saved, the + icon next to that language changes to an edit (pencil) icon. Click it to jump between your linked translations.
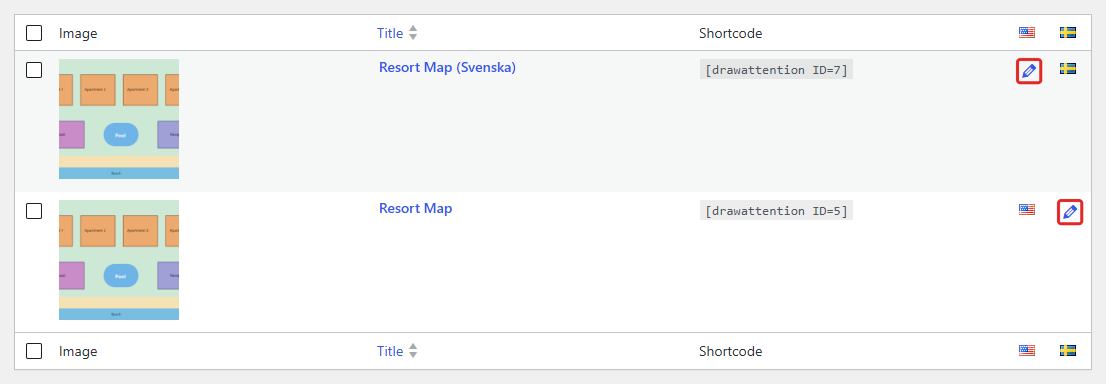
You can also see every translation from Draw Attention > All Images. The language columns show a flag or an edit icon for each translation, and a + icon wherever a translation doesn’t exist yet.
Add Your Interactive Image to Translated Pages
Polylang creates a separate copy of each page for each language, so you’ll need a translated version of the page where your interactive image appears.
- Open the page in your original language and click the + icon next to a language in the Languages box to create the translated page.
- Add the Draw Attention block, module, or shortcode to the translated page. Polylang doesn’t copy it over from the original page.
- Publish the translated page.
In the Pro Edition, you can choose your original interactive image in the block or shortcode on every translated page. Draw Attention automatically shows the matching translation for that page’s language.
In the Basic Edition, Draw Attention automatically shows the interactive image for that page’s language.
New pages are created in whichever language is selected in the admin bar language filter. If a new page ends up in the wrong language, check the filter before you create it.
View Your Translated Interactive Image
Visit the page with your original interactive image and scroll to your Language Switcher. Click another language to see the translated page with its interactive image.
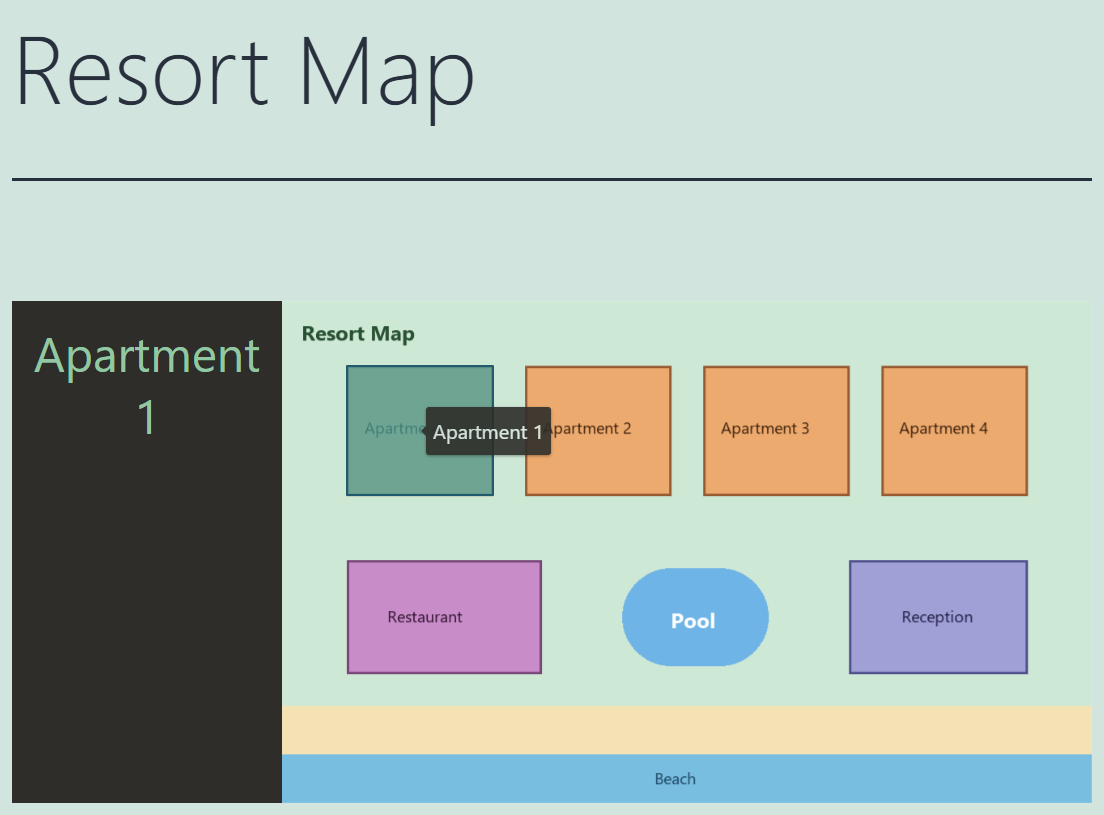
Example: English
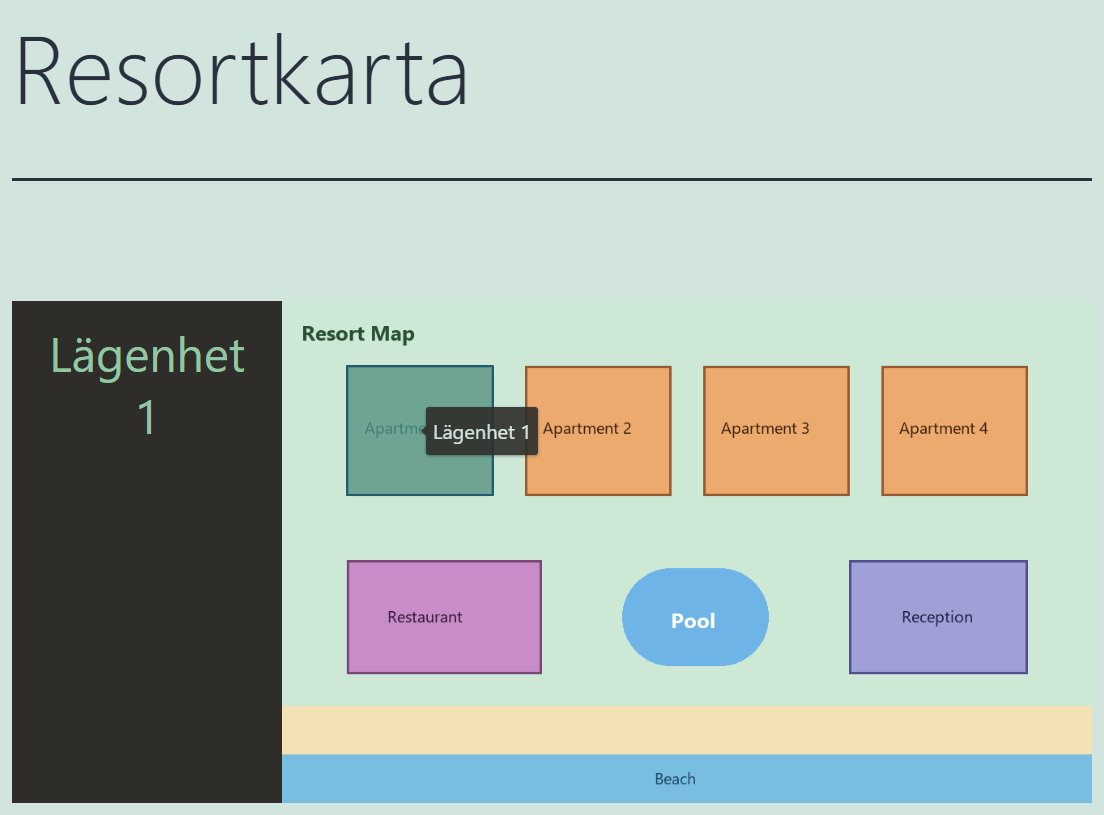
Example: Translated to Swedish
Related Guides
-

Complex Hotspot Content
-
FooGallery for Embedding Galleries
-
WPML For Translations
-
Advanced iFrame with Draw Attention